Installation Guide
Install via Docker
git clone https://github.com/MemTensor/MemOS.git
cd MemOS
Create .env Configuration File
The .env file must be placed in the MemOS project root directory.
1. Create .env
cd MemOS
touch .env
2. .env Contents
Here is a quick .env configuration example:
# OpenAI API Key (Required configuration)
OPENAI_API_KEY=sk-xxx
# OpenAI API Base URL
OPENAI_API_BASE=http://xxx:3000/v1
# Default model name
MOS_CHAT_MODEL=qwen3-max

# Memory Reader LLM Model
MEMRADER_MODEL=qwen3-max
# Memory Reader API Key
MEMRADER_API_KEY=sk-xxx
# Memory Reader API Base URL
MEMRADER_API_BASE=http://xxx:3000/v1

# Embedder Model Name
MOS_EMBEDDER_MODEL=text-embedding-v4
# Configure embedding backend: ollama | universal_api
MOS_EMBEDDER_BACKEND=universal_api
# Embedder API Base URL
MOS_EMBEDDER_API_BASE=http://xxx:8081/v1
# Embedder API Key
MOS_EMBEDDER_API_KEY=xxx
# Embedding Vector Dimension
EMBEDDING_DIMENSION=1024
# Reranker Backend (http_bge | etc.)
MOS_RERANKER_BACKEND=cosine_local

# Neo4j Connection URI
# Options: neo4j-community | neo4j | nebular | polardb
NEO4J_BACKEND=neo4j-community
# Required when backend=neo4j*
NEO4J_URI=bolt://localhost:7687
NEO4J_USER=neo4j
NEO4J_PASSWORD=12345678
NEO4J_DB_NAME=neo4j
MOS_NEO4J_SHARED_DB=false

# Whether to use redis scheduler
DEFAULT_USE_REDIS_QUEUE=false

# Enable Chat API
ENABLE_CHAT_API=true
# Chat model list, can be applied through Bailian. Models are customizable.
CHAT_MODEL_LIST=[{"backend": "qwen", "api_base": "https://xxx/v1", "api_key": "sk-xxx", "model_name_or_path": "qwen3-max", "extra_body": {"enable_thinking": true} ,"support_models": ["qwen3-max"]}]
.env Configuration Example using Bailian
# Can be applied through Bailian platform
# https://bailian.console.aliyun.com/?spm=a2c4g.11186623.0.0.2f2165b08fRk4l&tab=api#/api
# After successful application, get API_KEY and BASE_URL, configuration example as follows

# OpenAI API Key (Use Bailian API_KEY)
OPENAI_API_KEY=you_bailian_api_key
# OpenAI API Base URL
OPENAI_API_BASE=https://dashscope.aliyuncs.com/compatible-mode/v1
# Default model name
MOS_CHAT_MODEL=qwen3-max

# Memory Reader LLM Model
MEMRADER_MODEL=qwen3-max
# Memory Reader API Key (Use Bailian API_KEY)
MEMRADER_API_KEY=you_bailian_api_key
# Memory Reader API Base URL
MEMRADER_API_BASE=https://dashscope.aliyuncs.com/compatible-mode/v1

# Embedder model name can refer to the link below
# https://bailian.console.aliyun.com/?spm=a2c4g.11186623.0.0.2f2165b08fRk4l&tab=api#/api/?type=model&url=2846066
MOS_EMBEDDER_MODEL=text-embedding-v4
# Configure embedding backend: ollama | universal_api
MOS_EMBEDDER_BACKEND=universal_api
# Embedder API Base URL
MOS_EMBEDDER_API_BASE=https://dashscope.aliyuncs.com/compatible-mode/v1
# Embedder API Key (Use Bailian API_KEY)
MOS_EMBEDDER_API_KEY=you_bailian_api_key
# Embedding Vector Dimension
EMBEDDING_DIMENSION=1024
# Reranker Backend (http_bge | etc.)
MOS_RERANKER_BACKEND=cosine_local

# Neo4j Connection URI
# Options: neo4j-community | neo4j | nebular | polardb
NEO4J_BACKEND=neo4j-community
# Required when backend=neo4j*
NEO4J_URI=bolt://localhost:7687
NEO4J_USER=neo4j
NEO4J_PASSWORD=12345678
NEO4J_DB_NAME=neo4j
MOS_NEO4J_SHARED_DB=false

# Whether to use redis scheduler
DEFAULT_USE_REDIS_QUEUE=false

# Enable Chat API
ENABLE_CHAT_API=true

CHAT_MODEL_LIST=[{"backend": "qwen", "api_base": "https://dashscope.aliyuncs.com/compatible-mode/v1", "api_key": "you_bailian_api_key", "model_name_or_path": "qwen3-max-preview", "extra_body": {"enable_thinking": true} ,"support_models": ["qwen3-max-preview"]}]

Configure Dockerfile
The Dockerfile is located in the docker directory.
# Enter the docker directory
cd docker
Includes quick mode and full mode. You can choose to use the lite package (distinguished by arm and x86) or the full package (distinguished by arm and x86).
● Lite Package: Simplifies large dependencies like nvidia-related ones, effectively making the image lightweight for faster local deployment.
url: registry.cn-shanghai.aliyuncs.com/memtensor/memos-base:v1.0
url: registry.cn-shanghai.aliyuncs.com/memtensor/memos-base-arm:v1.0

● Full Package: Packaged with all MemOS dependencies into the image, allowing for a full-feature experience. Can be built and started directly by configuring the Dockerfile.
url: registry.cn-shanghai.aliyuncs.com/memtensor/memos-full-base:v1.0.0
url: registry.cn-shanghai.aliyuncs.com/memtensor/memos-full-base-arm:v1.0.0
# This example uses the lite package url
FROM registry.cn-shanghai.aliyuncs.com/memtensor/memos-base-arm:v1.0

WORKDIR /app

ENV HF_ENDPOINT=https://hf-mirror.com

ENV PYTHONPATH=/app/src

COPY src/ ./src/

EXPOSE 8000

CMD ["uvicorn", "memos.api.server_api:app", "--host", "0.0.0.0", "--port", "8000", "--reload"]
Start Docker Client
 # If Docker is not installed, please install the corresponding version. Download address:
 https://www.docker.com/

#After installation, Docker can be started through the client or through the command line
#Command line start
sudo systemctl start docker

# After installation, check docker status
docker ps

# Check docker images (optional)
docker images
Build and Start Service:
The build command must also be executed in the docker directory.
# In the docker directory
docker compose up
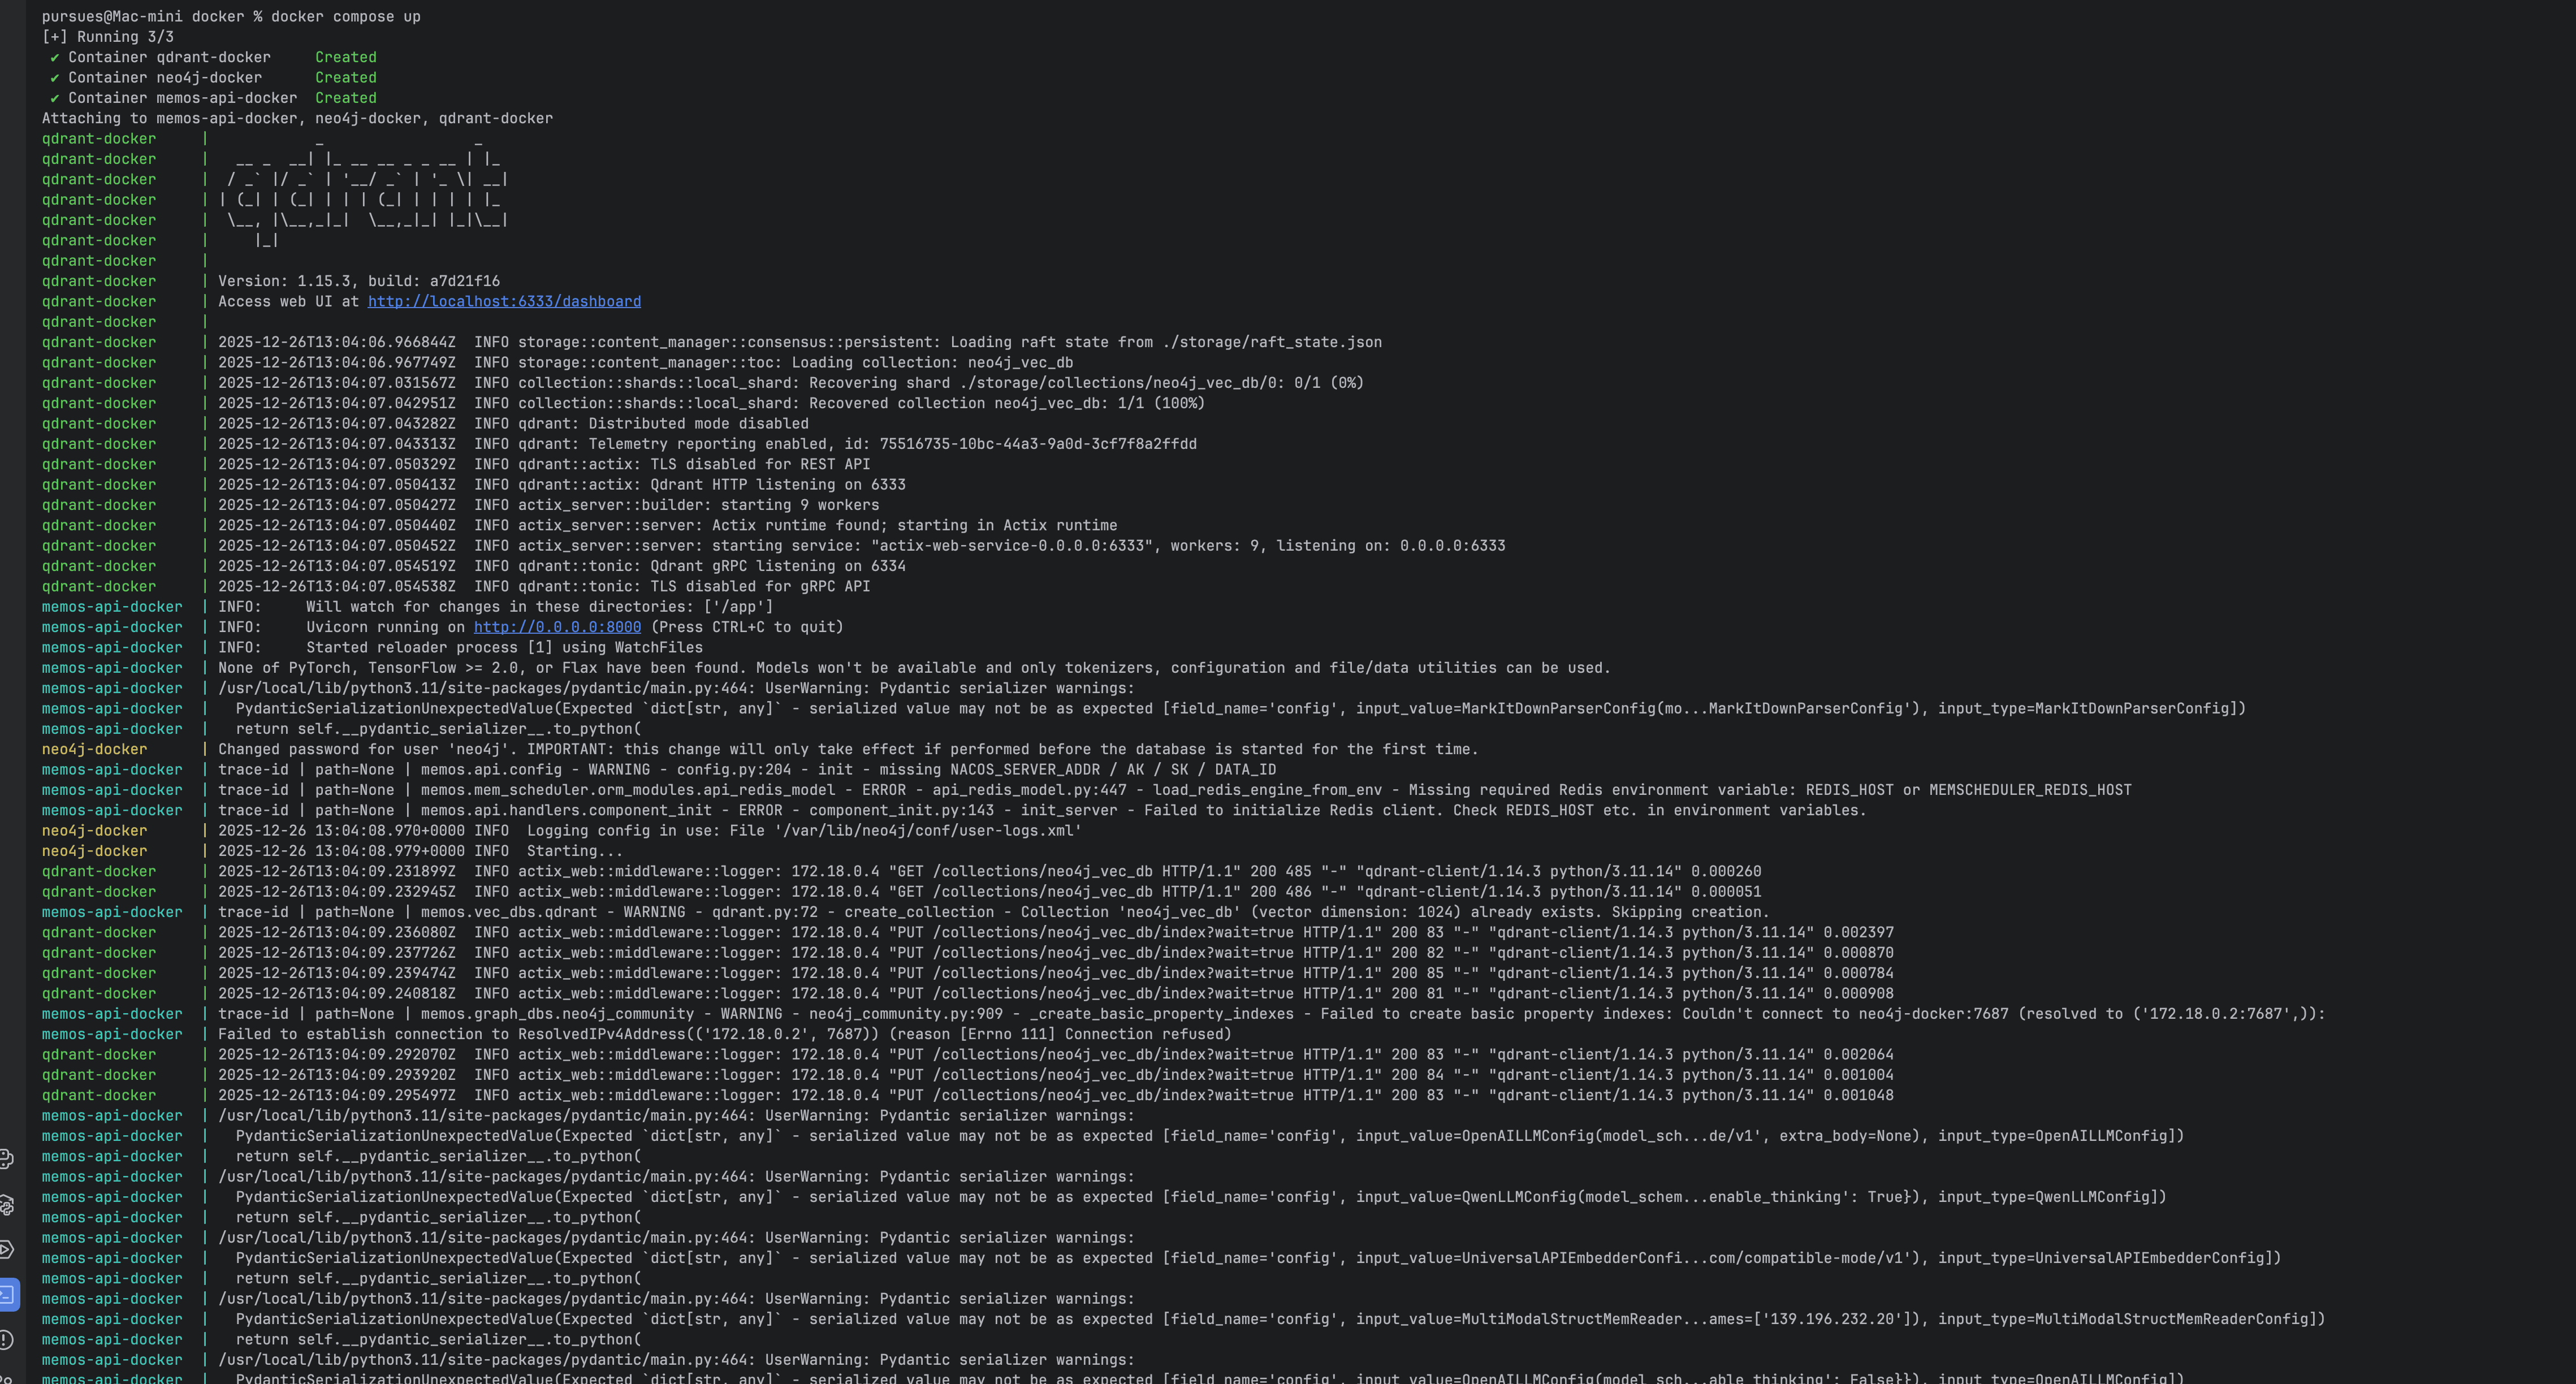
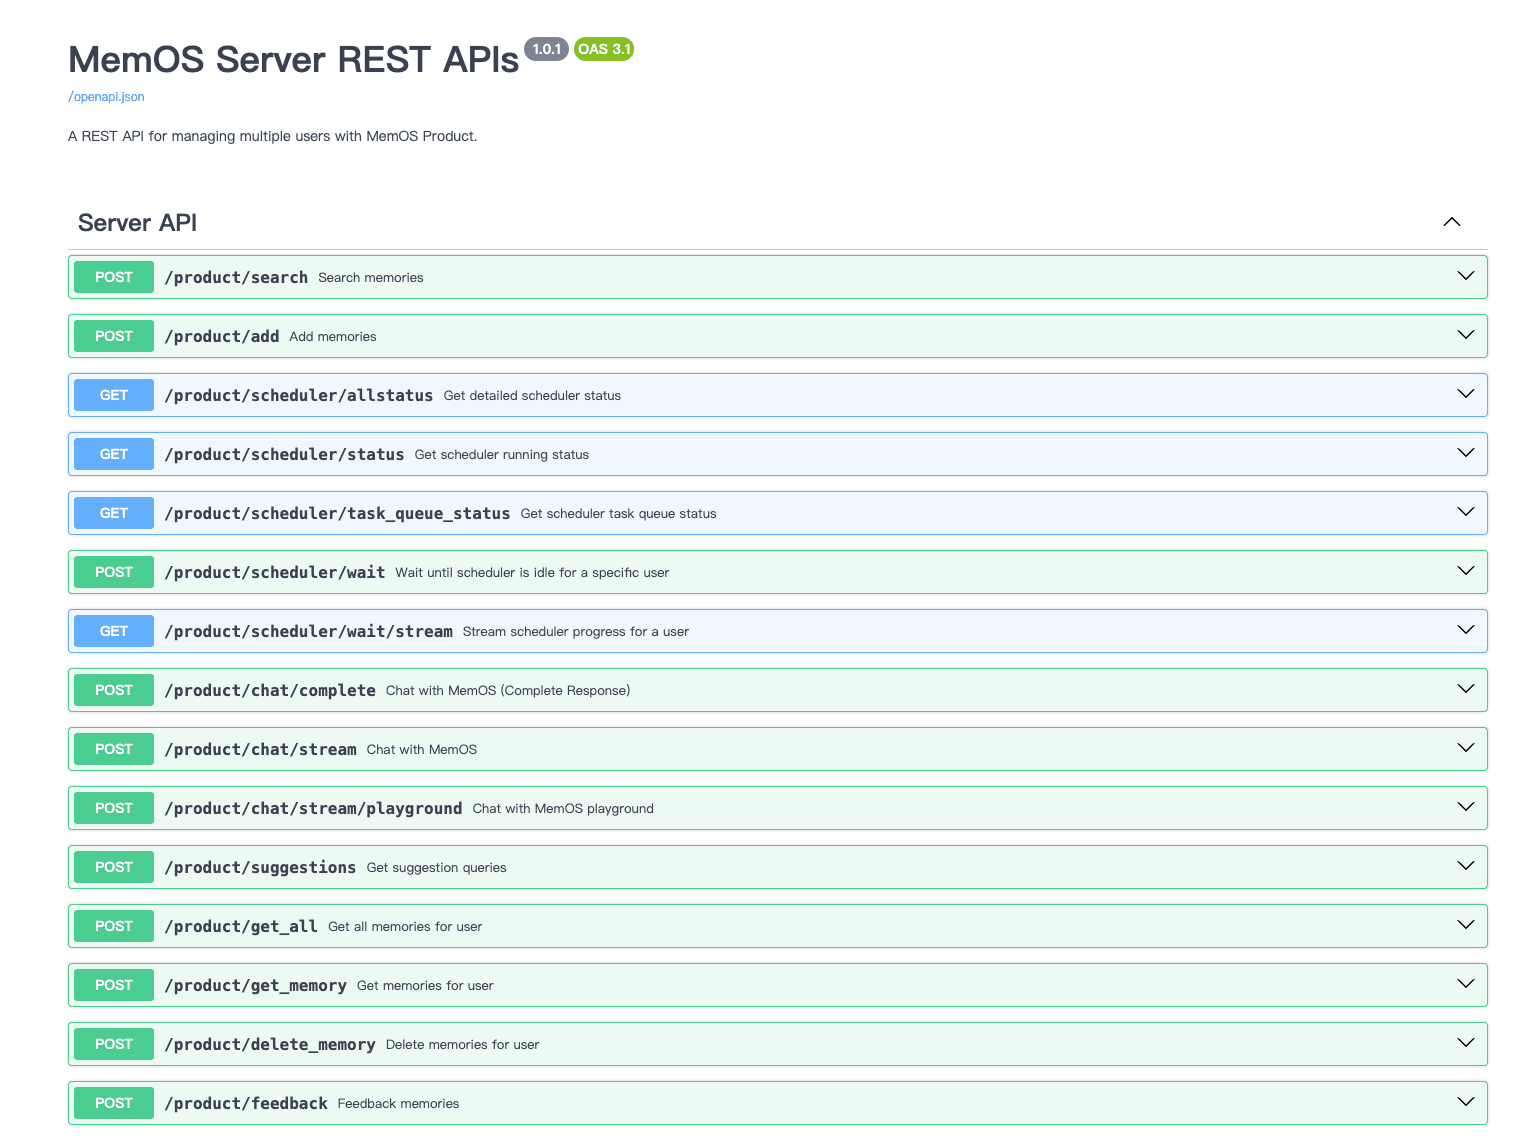
Access the API at http://localhost:8000/docs.
Search Memory
curl --location --request POST 'http://127.0.0.1:8000/product/search' \
--header 'Content-Type: application/json' \
--data-raw '{
    "query": "What do I like to eat",
     "user_id": "8736b16e-1d20-4163-980b-a5063c3facdc",
    "readable_cube_ids": ["b32d0977-435d-4828-a86f-4f47f8b55bca"],
    "top_k":20
  }'

# response
{
    "code": 200,
    "message": "Search completed successfully",
    "data": {
        "text_mem": [
          {
            "cube_id": "7231eda8-6c57-4f6e-97ce-98b699eebb98",
            "memories": [
              {
                  "id": "2f40be8f-736c-4a5f-aada-9489037769e0",
                  "memory": "[user opinion] User likes strawberries.",
                  "metadata": {
                      "user_id": "de8215e3-3beb-4afc-9b64-ae594d62f1ea",
                      "session_id": "root_session",
                      "status": "activated",
                      "type": "fact",
                      "key": "User's preference for strawberries",
                      "confidence": 0.99,
                      "source": null,
                      "tags": [
                          "preference",
                          "strawberries"
                      ],
                      "visibility": null,
                      "updated_at": "2025-09-18T08:23:44.625479000+00:00",
                      "memory_type": "UserMemory",
                      "sources": [],
                      "embedding": [],
                      "created_at": "2025-09-18T08:23:44.625511000+00:00",
                      "usage": [
                          "{
                          "time": "2025-09-18T08:24:17.759748",
                          "info": {
                            "user_id": "de8215e3-3beb-4afc-9b64-ae594d62f1ea",
                            "session_id": "root_session"
                            }
                          }"
                      ],
                      "background": "User expressed a preference for strawberries, indicating a tendency in dietary preferences.",
                      "relativity": 0.6349761312470591,
                      "vector_sync": "success",
                      "ref_id": "[2f40be8f]",
                      "id": "2f40be8f-736c-4a5f-aada-9489037769e0",
                      "memory": "[user opinion] User likes strawberries."
                  },
                  "ref_id": "[2f40be8f]"
              },
              ...
            }
          }
        ],
        "act_mem": [],
        "para_mem": []
    }
}
Install from Source
git clone https://github.com/MemTensor/MemOS.git
cd MemOS
Create .env Configuration File
The MemOS server_api relies on environment variables to start, so you need to create a .env file in the startup directory.
- Create .env file
cd MemOS
touch .env
- .env contents Please refer to the Docker installation for quick configurationenv configuration For detailed .env configuration, please refer to env configuration
The .env file must be placed in the MemOS project root directory.
Install Dependencies
# Execute the installation command
pip install -e .
pip install --no-cache-dir -r ./docker/requirements.txt
# Configure PYTHONPATH to the absolute directory of the current project file src
export PYTHONPATH=/******/MemOS/src
Neo4j Support
If you plan to use Neo4j for graph memory, please install Neo4j Desktop.
Additionally, you need to set NEO4J_BACKEND=neo4j in .env file
Start MemOS Server
# project root directory
uvicorn memos.api.server_api:app --host 0.0.0.0 --port 8000 --workers 1
Add Memory
curl --location --request POST 'http://127.0.0.1:8000/product/add' \
--header 'Content-Type: application/json' \
--data-raw '{

    "messages": [{
    "role": "user",
    "content": "I like eating strawberries"
  }],
    "user_id": "8736b16e-1d20-4163-980b-a5063c3facdc",
    "writable_cube_ids":["b32d0977-435d-4828-a86f-4f47f8b55bca"]
}'

# response
{
    "code": 200,
    "message": "Memory created successfully",
    "data": null
}
Search Memory
curl --location --request POST 'http://127.0.0.1:8000/product/search' \
--header 'Content-Type: application/json' \
--data-raw '{
    "query": "What do I like to eat",
     "user_id": "8736b16e-1d20-4163-980b-a5063c3facdc",
    "readable_cube_ids": ["b32d0977-435d-4828-a86f-4f47f8b55bca"],
    "top_k":20
  }'

# response
{
    "code": 200,
    "message": "Search completed successfully",
    "data": {
        "text_mem": [
          {
            "cube_id": "7231eda8-6c57-4f6e-97ce-98b699eebb98",
            "memories": [
              {
                  "id": "2f40be8f-736c-4a5f-aada-9489037769e0",
                  "memory": "[user opinion] User likes strawberries.",
                  "metadata": {
                      "user_id": "de8215e3-3beb-4afc-9b64-ae594d62f1ea",
                      "session_id": "root_session",
                      "status": "activated",
                      "type": "fact",
                      "key": "User's preference for strawberries",
                      "confidence": 0.99,
                      "source": null,
                      "tags": [
                          "preference",
                          "strawberries"
                      ],
                      "visibility": null,
                      "updated_at": "2025-09-18T08:23:44.625479000+00:00",
                      "memory_type": "UserMemory",
                      "sources": [],
                      "embedding": [],
                      "created_at": "2025-09-18T08:23:44.625511000+00:00",
                      "usage": [
                          "{
                          "time": "2025-09-18T08:24:17.759748",
                          "info": {
                            "user_id": "de8215e3-3beb-4afc-9b64-ae594d62f1ea",
                            "session_id": "root_session"
                            }
                          }"
                      ],
                      "background": "User expressed a preference for strawberries, indicating a tendency in dietary preferences.",
                      "relativity": 0.6349761312470591,
                      "vector_sync": "success",
                      "ref_id": "[2f40be8f]",
                      "id": "2f40be8f-736c-4a5f-aada-9489037769e0",
                      "memory": "[user opinion] User likes strawberries."
                  },
                  "ref_id": "[2f40be8f]"
              },
              ...
            }
          }
        ],
        "act_mem": [],
        "para_mem": []
    }
}
Install via pip
The simplest way to install MemOS is using pip.
Create and Activate Conda Environment (Recommended)
To avoid dependency conflicts, it is strongly recommended to use a dedicated Conda environment.
conda create -n memos python=3.11
conda activate memos
Install MemOS from PyPI
Install MemOS with all optional components:
pip install -U "MemoryOS[all]"
After installation, you can verify it was successful:
python -c "import memos; print(memos.__version__)"
MemOS provides several optional dependency groups for different features. You can install them based on your needs.
| Feature | Package Name |
|---|---|
| Tree Memory | MemoryOS[tree-mem] |
| Memory Reader | MemoryOS[mem-reader] |
| Memory Scheduler | MemoryOS[mem-scheduler] |
pip install MemoryOS[tree-mem]
pip install MemoryOS[tree-mem,mem-reader]
pip install MemoryOS[mem-scheduler]
pip install MemoryOS[tree-mem,mem-reader,mem-scheduler]
Create .env Configuration File
The MemOS server_api relies on environment variables to start, so you need to create a .env file in the startup directory.
- Create .env file
touch .env
- Example .env contents
# ========== Required Configuration ==========
CHAT_MODEL_LIST='[
  {
    "name": "default",
    "backend": "openai",
    "config": {
      "model": "gpt-4o-mini",
      "api_key": "YOUR_API_KEY"
    }
  }
]'

# ========== Optional Configuration ==========
MEMOS_LOG_LEVEL=INFO
env notes
For detailed development environment setup, workflow guidelines, and contribution best practices, please see our Contribution Guide.
Start MemOS Server
MemOS does not automatically load .env files. Please use the python-dotenv method to start.
python -m dotenv run -- \
  uvicorn memos.api.server_api:app \
  --host 0.0.0.0 \
  --port 8000
After successful startup, you will see output similar to:
INFO:     Uvicorn running on http://0.0.0.0:8000
INFO:     Application startup complete.
Verify Service is Running
Ollama Support
To use MemOS with Ollama, first install the Ollama CLI:
curl -fsSL https://ollama.com/install.sh | sh
Transformers Support
To use functionalities based on the transformers library, ensure you have PyTorch installed (CUDA version recommended for GPU acceleration).
Neo4j Support
If you plan to use Neo4j for graph memory, please install Neo4j Desktop.
Download Examples
To download example code, data, and configurations, run the following command:
memos download_examples